Particle Designer allows you to design particle effects for your games. Particle effects can create a vast range of effects from snow to smoke, fire, water and explosions. Particle effects are often used to generate organic type effects which could take up significant texture space if done using normal animation techniques. Particle systems are able to provide complex effects using just a simple configuration file. This reduces the amount of memory needed and also gives you the ability to change particle effects in realtime.
The output from Particle Designer can be used with a number of different game development frameworks including: Cocos2d-iPhone, Cocos2d-x, Cocos2d-html, Platino, Sparrow, Starling, Moai, KoboldKit, PixelWave, NME and Marmalade.
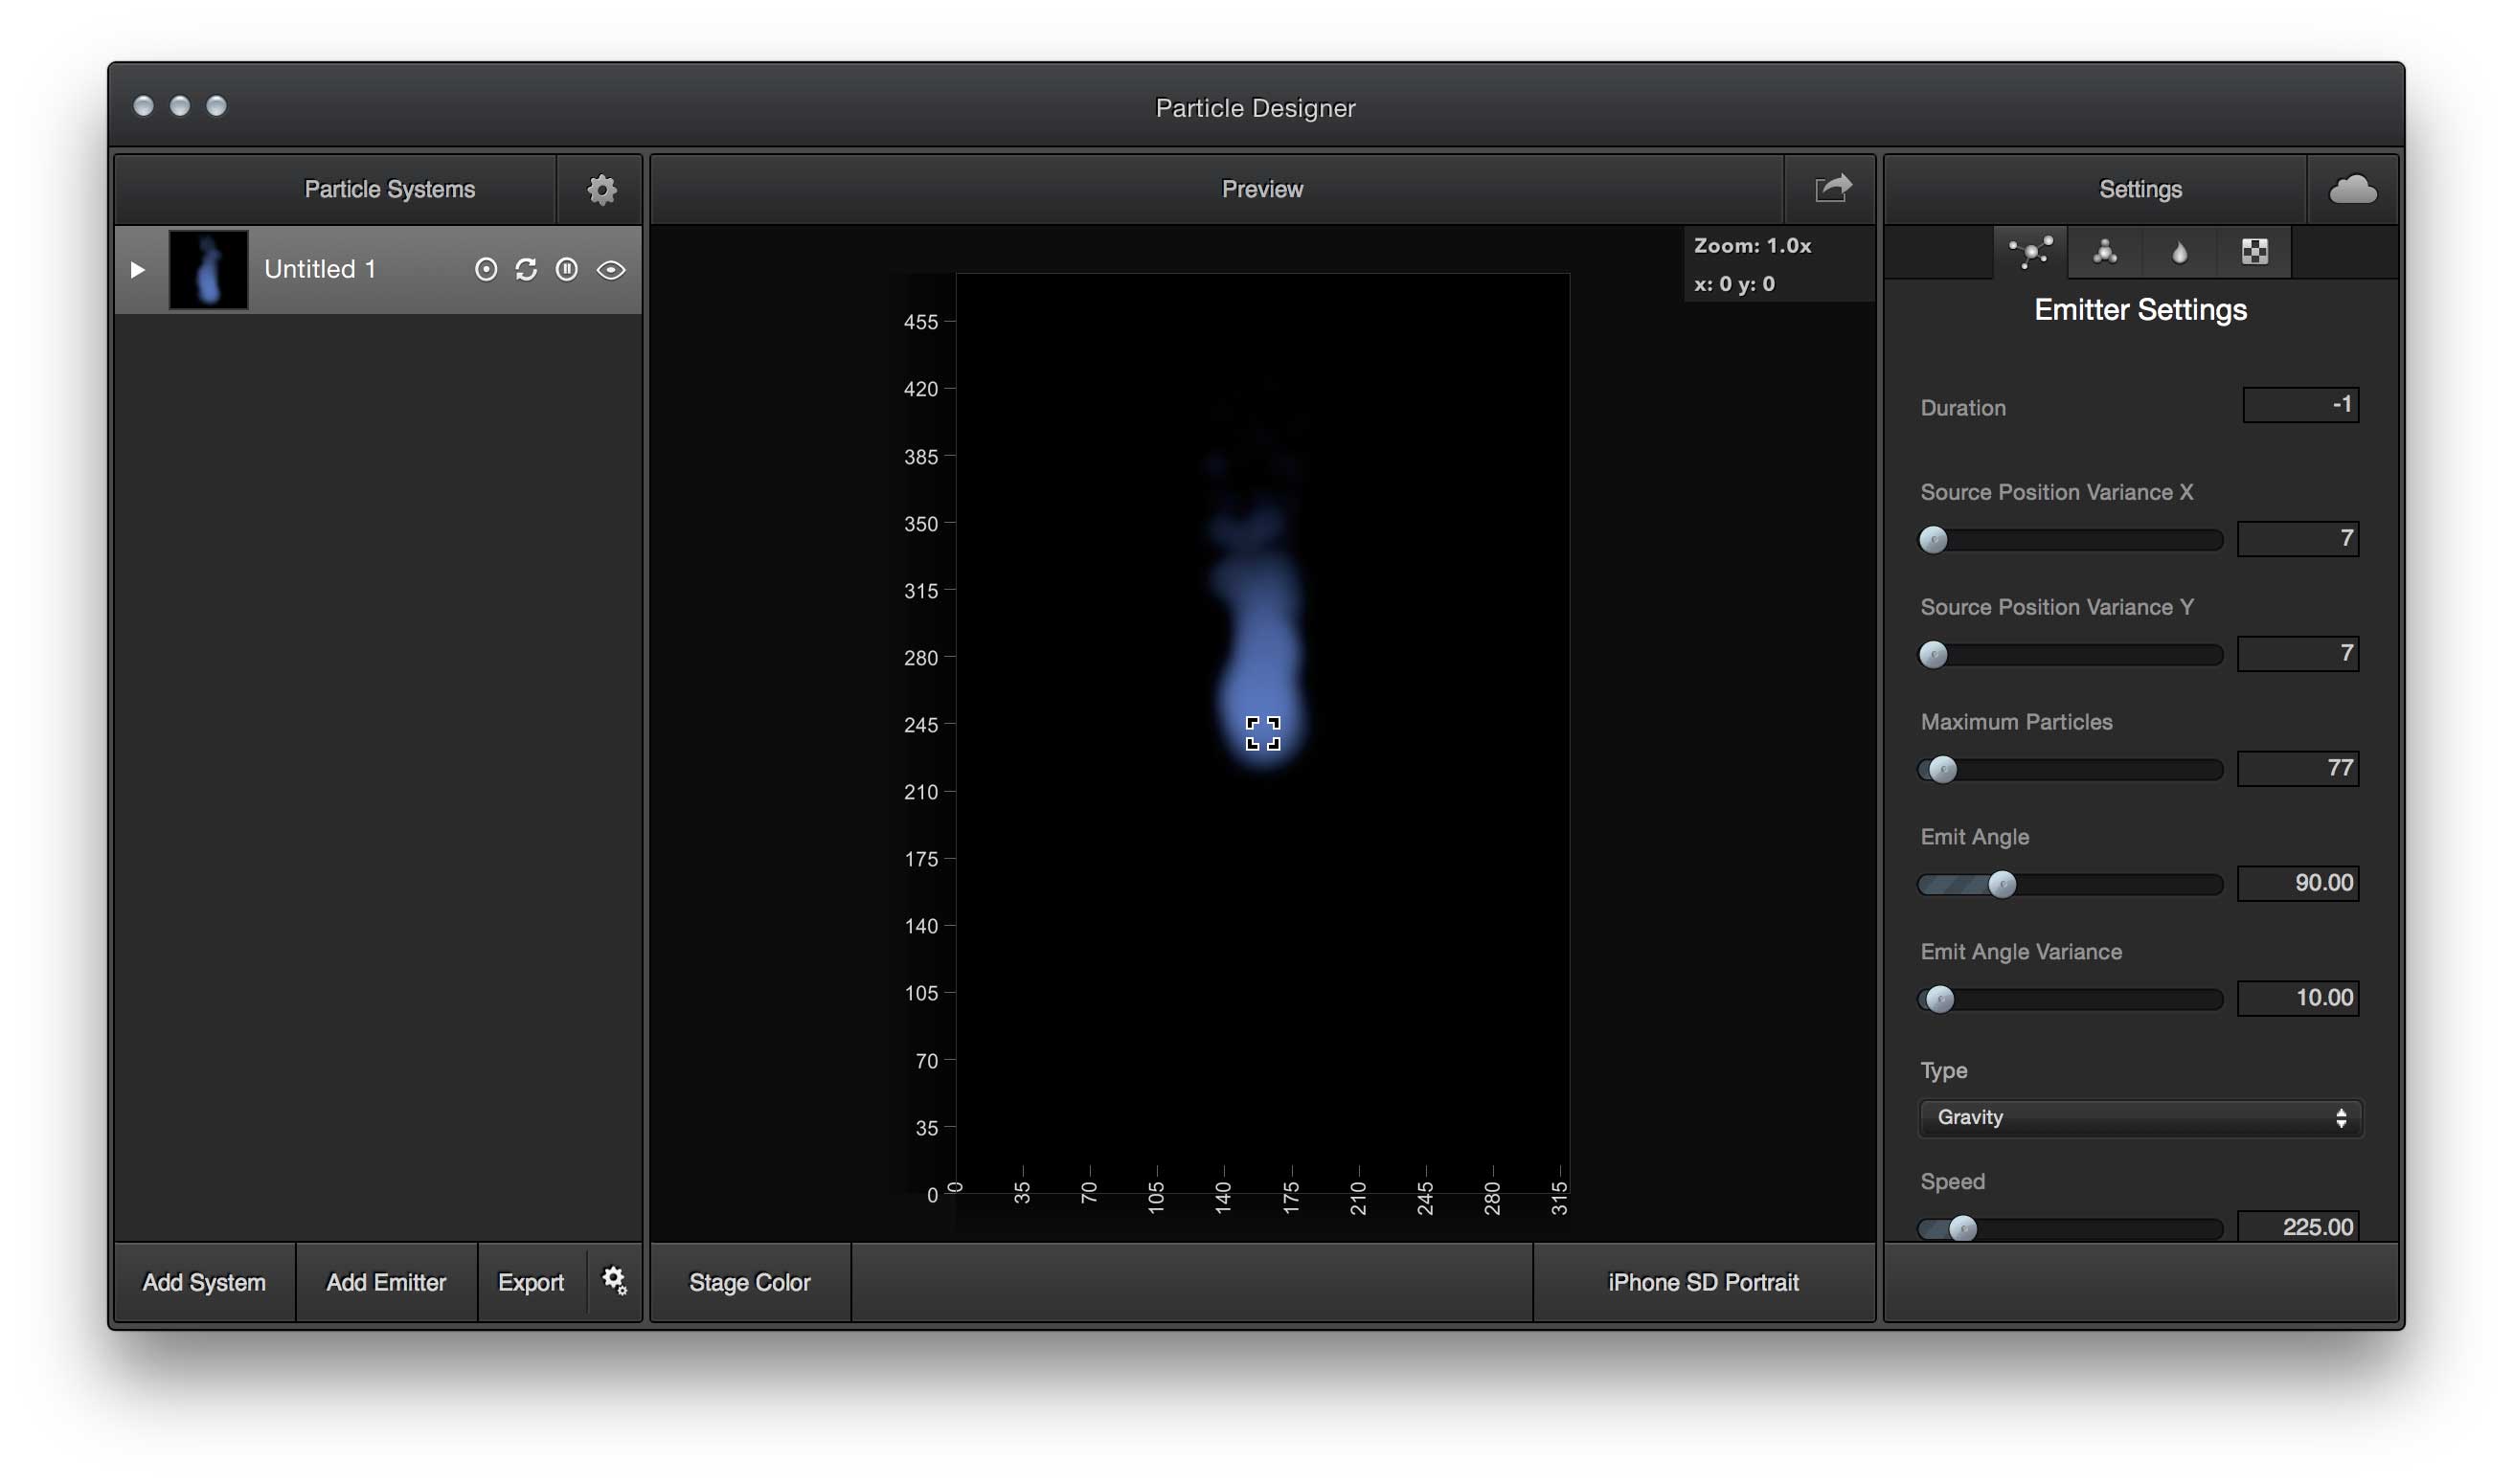
When you start Particle Designer you’ll be presented with a view similar to the one below. The main user interface is split into three sections, Particle Systems, Preview and Settings. The left hand side of the app shows your current project. The center view is called the stage and shows a real time preview of all your particle emitters. The right hand panel shows all the properties you can change on the selected particle system.
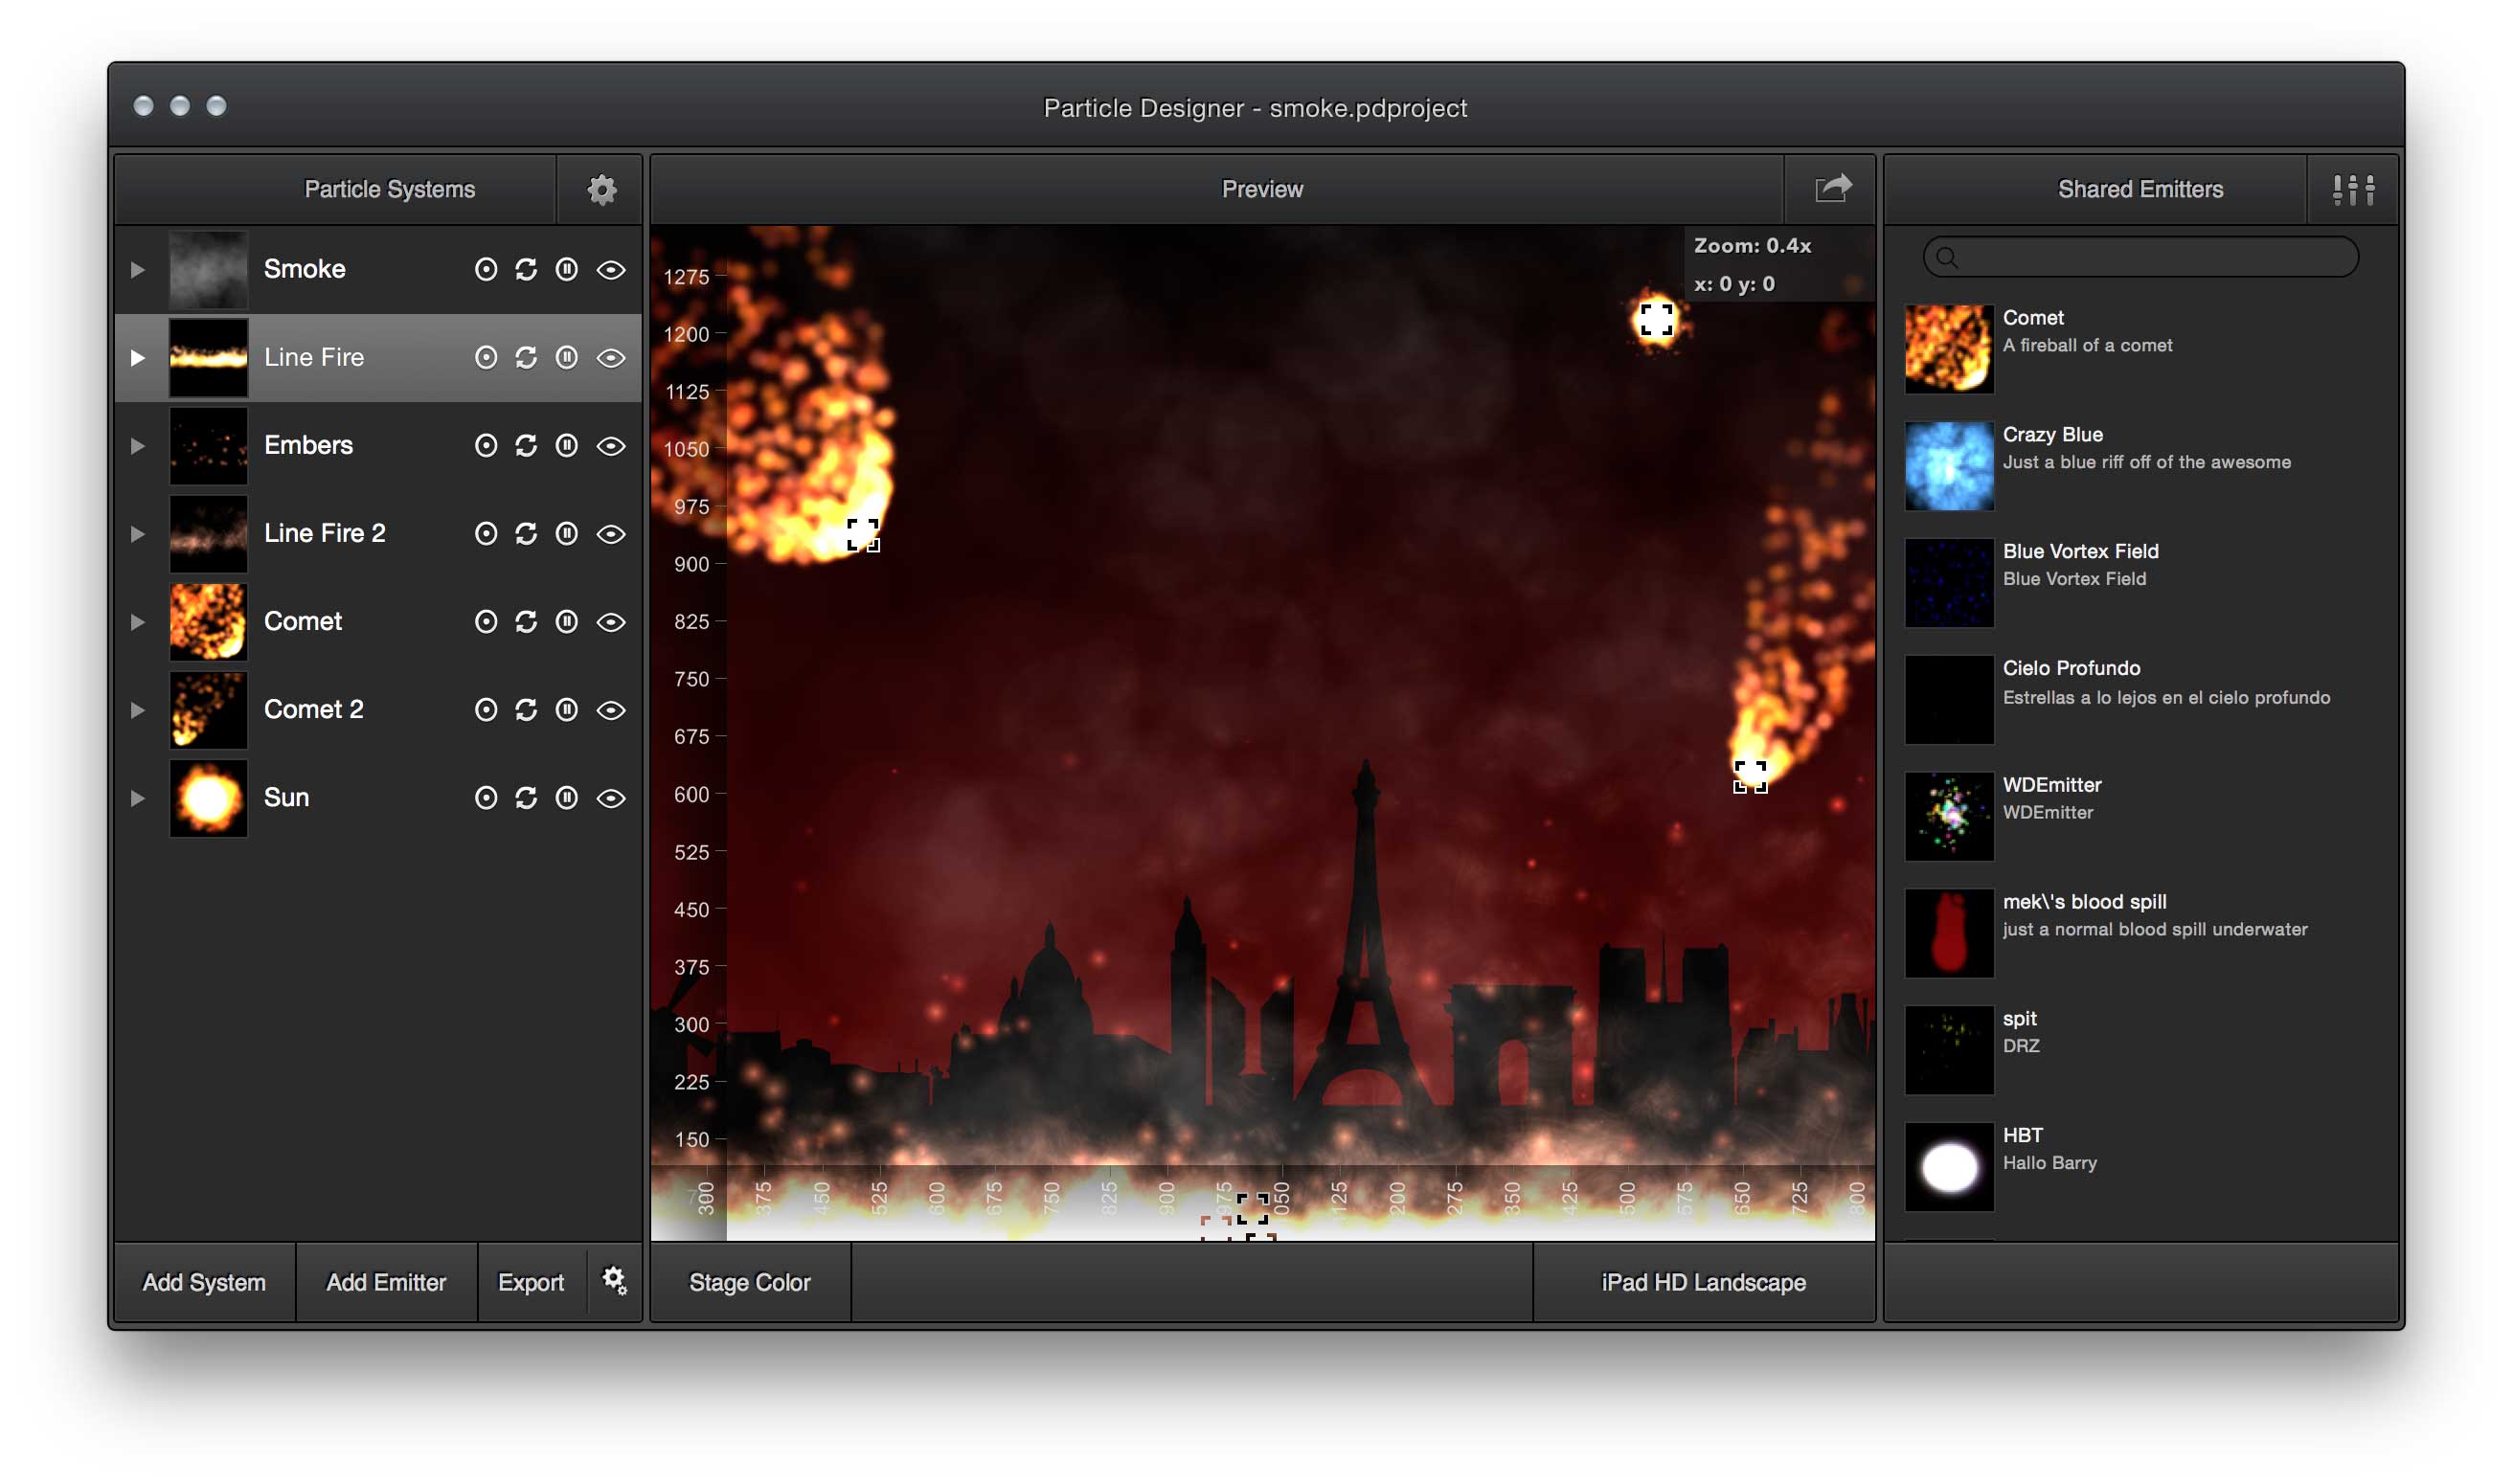
This panel displays a list of all the particle system configurations you have in your current project. A single project is capable of configuring multiple particle systems. This allows you to create sophisticated particle effects using multiple particle systems.
Each entry in the Particle Systems list contains a number of different elements as shown in the “Smoke” sample project.
First is the particle system thumbnail image. This provides an almost realtime view of what the particle system looks like, helping to identify a specific particle system in the preview window.
Next is the title of the particle system. By default new particle systems are given the name “Untitled” followed by a number. The title of a particle system is important as it's used during export when naming the configuration and texture files. Particle system textures can either be embedded within the exported configuration file or as a separate PNG file. This is covered in more detail in the section on Exporting particle systems.
The particle system name can be changed by either clicking on the name itself or pressing the return key while an entry is highlighted in the particle system list.
To the right of the particle system name are controls that are used to control all particle emitters linked to that particle system in the preview window. Their purpose is described below.
![]()
When switched on, grouped, all particles emitted will be moved around based on the position of the particle emitter.
When switched off, relative, all particles are positioned relative to the position of the particle emitter. This is useful if you want to see how effects such as smoke or file look should the emitter be moving on screen.
![]()
If selected this causes the particle system to repeat continuously within the preview window. If not selected then the particle system will run once and then stop.
![]()
Play and pause allow the particle system to be paused and appear static in the preview window and then played causing the particles to animate.
![]()
Used to hide or show a particle system within the preview window. By right clicking on the Particle System list, you can access a context menu that allows for all Particle Systems to be hidden or shown.
The particle systems list is an outline view that can be expanded as shown in the following example.
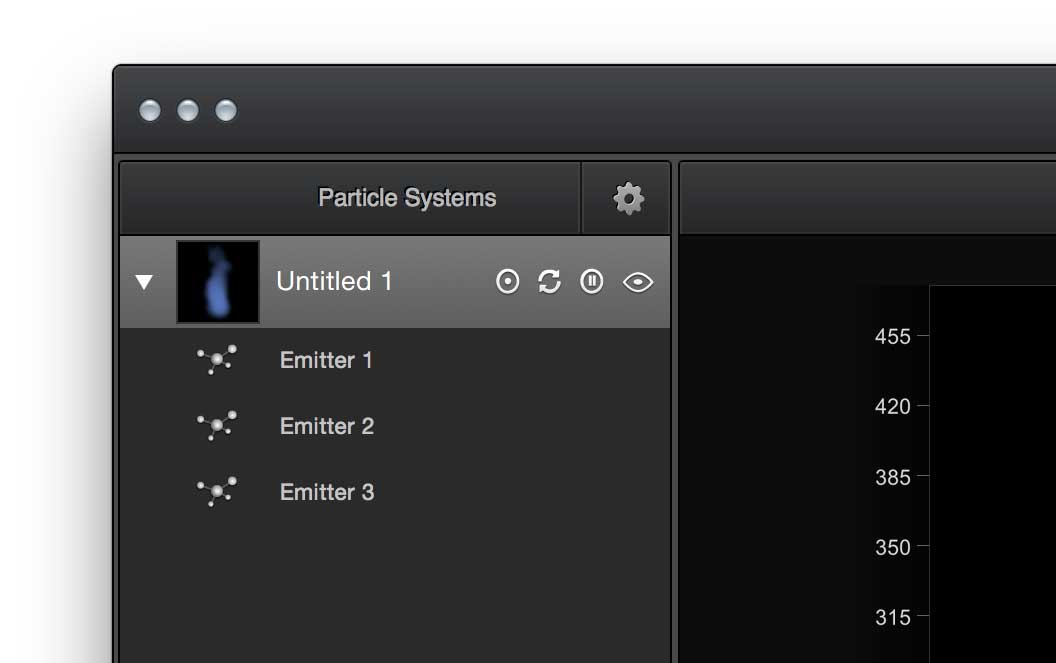
A single particle system may contain any number of particle emitters. Each emitter can be positioned independently within the preview view but all share the configuration of their parent Particle System. Any action carried out on the Particle System affects all emitters related to the system.
At the bottom of the Particle System list are three buttons that look like this.
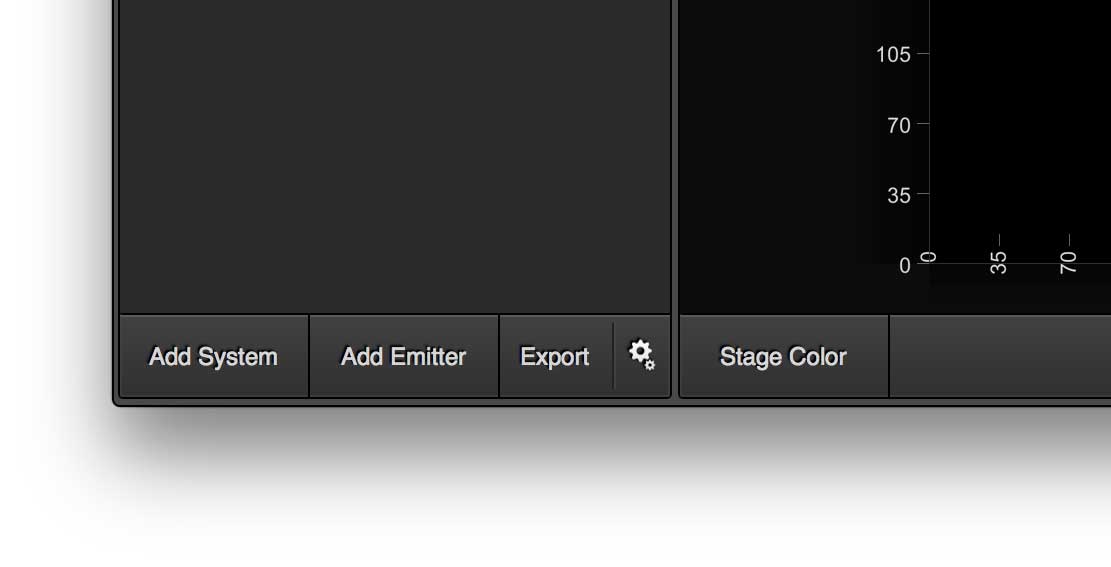
To add a new Particle System simply press the Add System button. A new Particle System will then be added to your project. When you create a new particle system, a particle emitter is also created and added to the preview panel, centered in the preview panels current position.
To bring an existing Particle System into your project you can either drag the .LAP file into the outline view, or use the Import Emitter File option from within the File menu.
Adding additional Particle Emitters is done by highlighting the Particle System to which you want to add the emitter and pressing the Add Emitter button. This allows you to see the effect of multiple instances of the same particle system. For example, this can be particularly useful if your designing a rocket with several boosters.
Particle Emitters within Particle Systems are rendered in the reverse order in which they appear in the outline view e.g. a Particle System at the bottom of the list will render on top of all the other Particle Systems. It is possible to change the order in which the systems are rendered simply by dragging the Particle System entries up and down within the outline view.
To export a Particle System use the Export button at the bottom of the Particle Systems panel. This button is broken into two sections. The right hand section showing the gear icon is used to define the location to be used during an export.
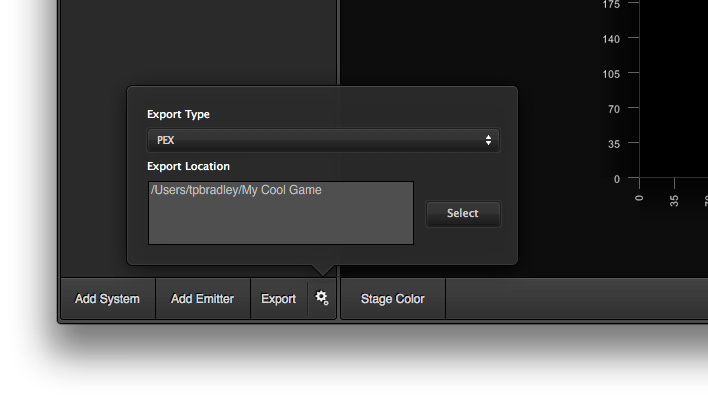
Important
When exporting, the name of the Particle System will be used as the name of the exported file. Particle Systems with duplicate names will be overwritten. The order in which they are exported is not guaranteed.
Pressing the Select button within the config panel displays a file selection dialogue that can be used to select the location for the exported configuration files. The exported files will use the .PEX extension. Pressing ESC or clicking the export config button again dismisses the export config panel.
To configure which Particle Systems are to be exported, locate the arrow at the top right of the Particle Systems panel. Clicking this icon expands the particle systems panel to reveal export options for each particle system as shown here.
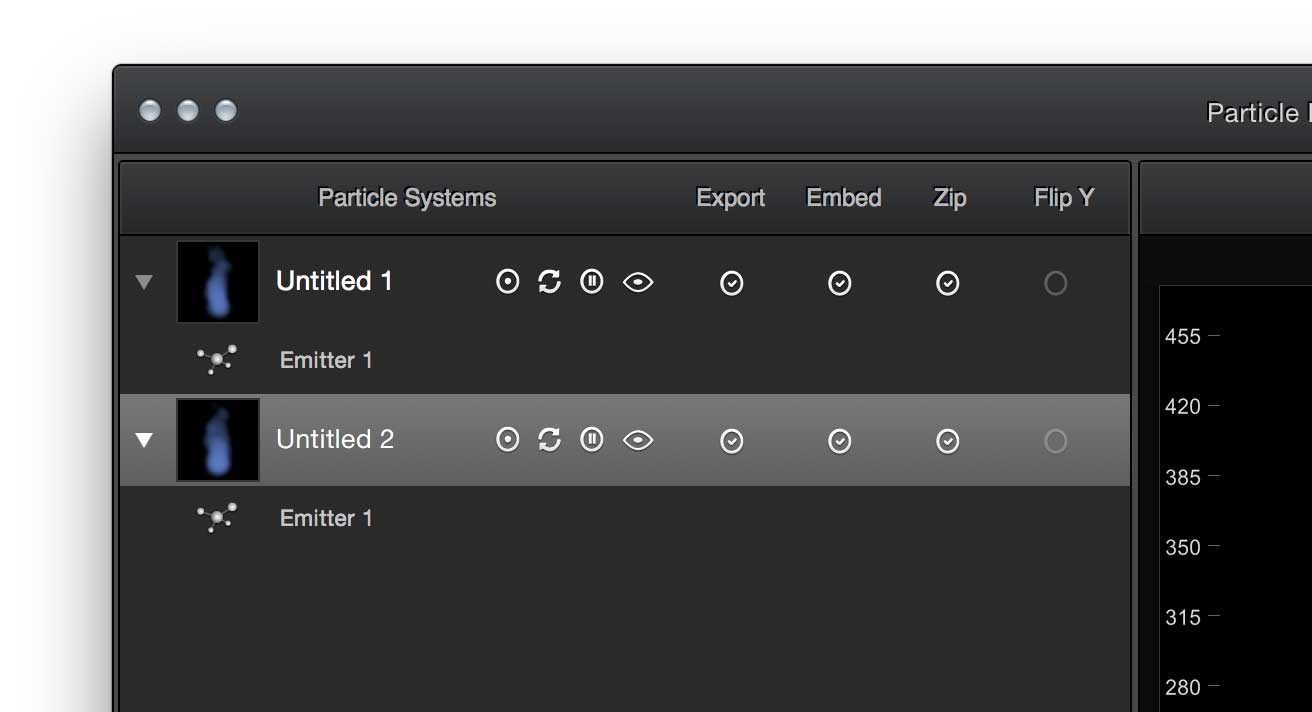
Placing a tick within the export column will cause the associated Particle System to be exported. All particle systems marked for export are exported to the configured location.
The embed column defines whether or not the particle texture should be embedded within the exported file. If a particle image is embedded, it's encoded into a base64 string and stored within the data attribute of the texture element in the exported file. The name attribute within the texture element is set as the Particle System name with a .PNG extension.
If the particle image is not marked as embedded, a PNG file is created in the export location using the Particle System name.
The Zip check box is used to zip the image data stored in the exported file. You should check to make sure that the framework you are using supports zipped or unzipped image data.
If you want to share a project with someone this can be easily achieved using the built in sharing feature of Particle Designer. At the top right hand corner of the preview window you will see a sharing button. Once you have saved your current project, pressing the sharing button will give you a popup list of the different ways you can share. These are Email, Message and Airdrop. Selecting one of these options will present you with the interface necessary to perform the share. When sharing in this way the last saved project file is sent to the recipient.
If you want to share a particle system you have created with the Particle Designer user community, you can right click on that Particle System in the Particle Systems panel and select the Share option.
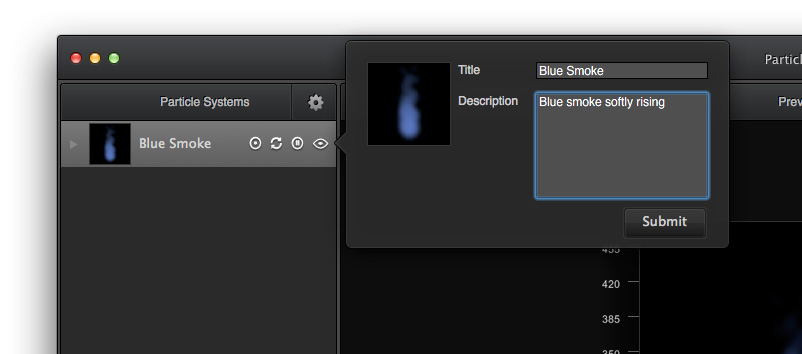
This popup display a thumbnail of the Particle System to be shared and allows you to provide a title and description. When you then hit the submit button this information is sent back to the cloud based Particle Designer sharing platform for others to see and use.
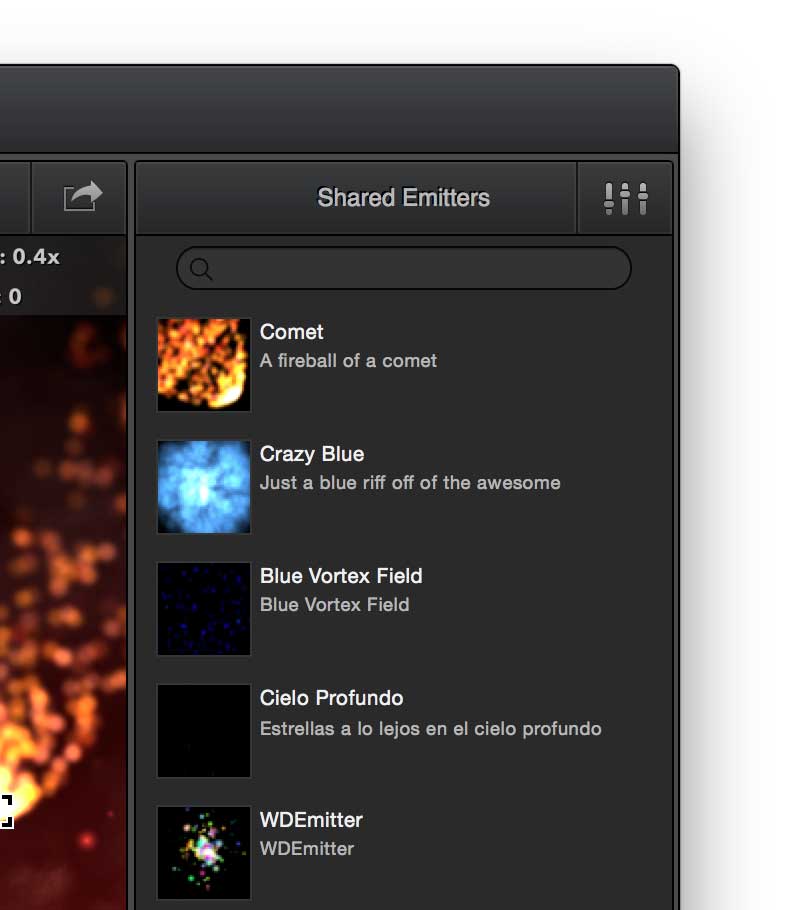
To view Particle Systems that others have shared you can press the Cloud button in the top right hand corner of the Settings panel on the right of the User Interface. This will spin the settings panel around to display and searchable list of the shared emitters.
Selecting a shared emitter will cause the currently selected Particle System in your project to take on that shared systems configuration. This allows you to easily go through the list and see what a Particle System looks like.
Typing a phrase into the search bar will cause the shared particle systems list to be filtered based on what has been typed. Both the title and description fields are used in the filter.
The preview is a real time view of how your particle emitters will look when they are running in a game. This is the main design window within Particle Designer.
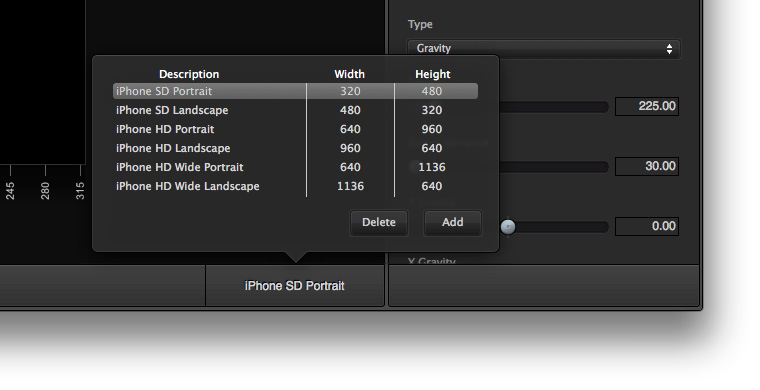
The stage is a frame inside the preview that shows available screen space for your chosen device profile. You can change the stage size by clicking the button at the bottom right of the preview panel and selecting the desired profile from the list. The title of this button displays the currently selected stage size profile.
Each project starts with a default list of size profiles. Particle Designer comes with a preconfigured list of popular size profiles which can be altered in the application preferences. If you need to add a specific profile to the current project only, you can add it through the stage size selection window. You can also alter all properties of existing stage sizes through this popup window. All stage sizes available in the stage size selection window are stored with the project file.
Along the left and bottom edges of the stage you'll find two rulers showing the pixel location within the stage. These rulers can turned on or off from the view menu or by pressing CMD + R.
When you drag an image onto the live preview, Particle Designer will display it centered behind all running emitters. This is particularly useful when dragging on a screenshot of your game to help you accurately adjust your emitters size and appearance.
To clear the background image you use the ‘Clear Background Image’ option in the View menu.
To pan around the stage, simply click and drag or use the 2 finger gesture on a track pad. You can zoom in or out of the preview by pressing CMD + +/- or using the pinch gesture on a trackpad. You can reset your view to 100% zoom and a centered stage by using the options in the view menu or their shortcuts.
If you need to design a particle emitter on a different color background, simply click the stage color button at the bottom left of the live preview. Should you wish to hide the emitter handles, this can be done through the View menu option and it’s shortcut.
Particle Designer has full support for copy and paste. If you want to copy a Particle System to another project, simply select the particle system to copy and use the Copy item in the Edit menu, or press CMD + C. Inside your new project simply pressing CMD + V will then paste that copied particle system into your project.
It is also possible to perform a quick duplication by using the Duplicate item in the Edit menu or it’s shortcut. The Duplicate option is also available through a context menu on the Particle Systems list.
The four tab panels located on the right hand side of Particle Designer allow you to configure every aspect of your particle system. The different tabs are explained in the table below.
![]() Emitter Settings allows you to configure properties related to the emitter. This includes the max number of particles, angle that particles are emitted and the type of emitter e.g. Gravity or Radial based.
Emitter Settings allows you to configure properties related to the emitter. This includes the max number of particles, angle that particles are emitted and the type of emitter e.g. Gravity or Radial based.
![]() Particle Settings allows properties that relate to individual particles to be configured. This includes properties such as start and end size, start and end rotation and life span.
Particle Settings allows properties that relate to individual particles to be configured. This includes properties such as start and end size, start and end rotation and life span.
![]() Color Settings is where you define the colors that should be applied to particles. A start and end color can be defined for the particles along with variances that should be applied.
Color Settings is where you define the colors that should be applied to particles. A start and end color can be defined for the particles along with variances that should be applied.
![]() Texture Settings is where you can view and change the particle image that is to be used for the particles.
Texture Settings is where you can view and change the particle image that is to be used for the particles.
It is possible to nudge the values for each of the number based particle emitter properties. By selecting the text box in which the numbers are displayed, pressing the up and down keys on the keyboard will cause the number to increment and decrement by 0.1 for float based number and 1 for integer based numbers.
Pressing the ship key while using the up and down arrow keys causes float number to increment and decrement by 1.0 and integer numbers by 5.
There are two sections within the Particle Designer preferences panel, Stage Size and Stage Settings.
The stage size table allows you to configure the default stage sizes that are added to new projects. All the sizes in this table are available in the stage size popup in your projects. Within a project it is possible to add one off sizes and also remove sizes that you do not want to use.
Within the stage size preferences its also possible to set the default stage size to be used when you start a new project.
If you want to reset the stage size preferences to factory defaults then you can use the Reset button.
The stage settings preferences allow you to define the default stage color to be used when starting new projects.